Calendar
The calendar module is part of the scheduling addon in Hexa Center. Use the calendar addon to create appointments, view your colleagues appointments and create video calls.
1. Calendar definition
The calendar addon in Hexa Center allows users to schedule and organize appointments, providing a centralized platform for managing time-sensitive tasks and events. View users' appointments, create appointments yourself, send out emails notifying users of your new or existing appointment, etc.
2. Navigating the calendar overview
To access the calendar overview, navigate to the Calendar tab located under the Scheduling addon. The layout of the calendar overview is very similar to what most users are used to, bearing resemblance to the likes of Google and MacOS calendar apps.
2.1 Collapsing the navigation menu
To collapse, or hide, the navigation menu, click on the small arrow icon located at the very top of the calendar overview page. This action will close the menu, providing a more spacious view of the calendar content.

2.2 Navigating through dates
By clicking on one the available time scope options: month, week, workweek, or day, you can switch between focused and broader overviews.
-
Month: When selecting
month, the calendar will display all the days in a month, allowing you to have a comprehensive view of the entire month's events and appointments. -
Week: Similarly, choosing 'week' will narrow down the display to show a week's worth of activities
-
Workweek: The workweek overview is the most costomizable of these options. This overview changes based on your work hour preferences, as set on the Preferences page.
Only days where work time is scheduled on are shown. The exact schedulded work time, per day, is highlighted in a shade of grey on the calendar overview. In this mode the overview only shows your working days and the scheduled times on those working days, it doesn't change based on which user's calendar you're viewing.
If your working day preferences are not set the workweek overview will default to showing the default Monday to Friday workweek.
- Day: If you opt for
day, the calendar will concentrate solely on the events and tasks of the selected day.
Additionally, changing the scope of the overview also affects the way the navigation buttons behave.
On the calendar interface, you will find two navigation buttons: a left button and a right button. When the scope is set to 'month', clicking the right button will advance the calendar by one month. Similarly, clicking the left button will take you back one month. This navigation behavior applies to the other scope options as well, aligning with your current selection.
Clicking on today brings you back to today's date.

2.3 Viewing other users' calendars
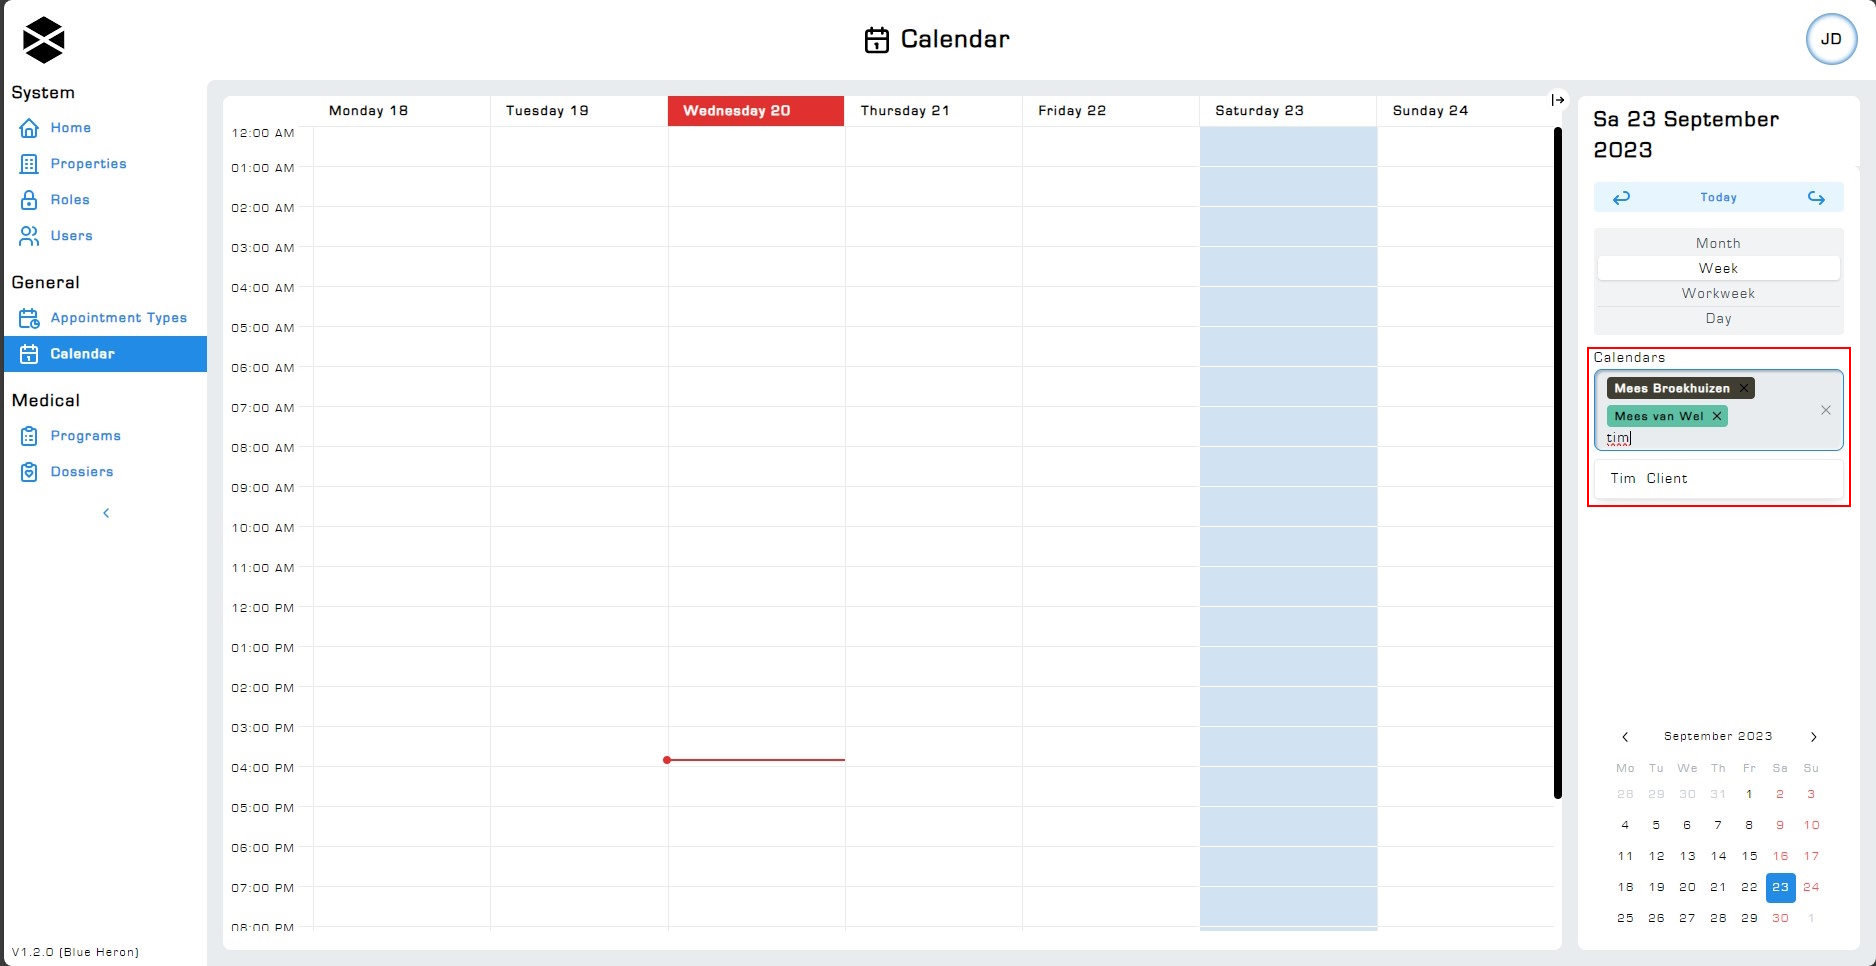
To view other users' calendars, use the Calendars field on the right-side navigation menu. If the navigation menu is not visible, it's likely in its collapsed state. To make it visible again, simply click the small arrow icon at the top right of the calendar overview page. This will expand the menu and grant access to its options.
Click on the Calendars field to generate a dropdown menu constisting of all users. Search for users by first clicking on the Calendar field, then typing in a user's name. Select the user to add them to the selection. To view multiple calendars at once, select multiple users from the dropdown menu.
To remove all added users at once click on the small x icon next to the list of users. This x icon is seperate from the x icon next to the user's name, which is used to remove that specific user from the overview.

3. Creating appointments

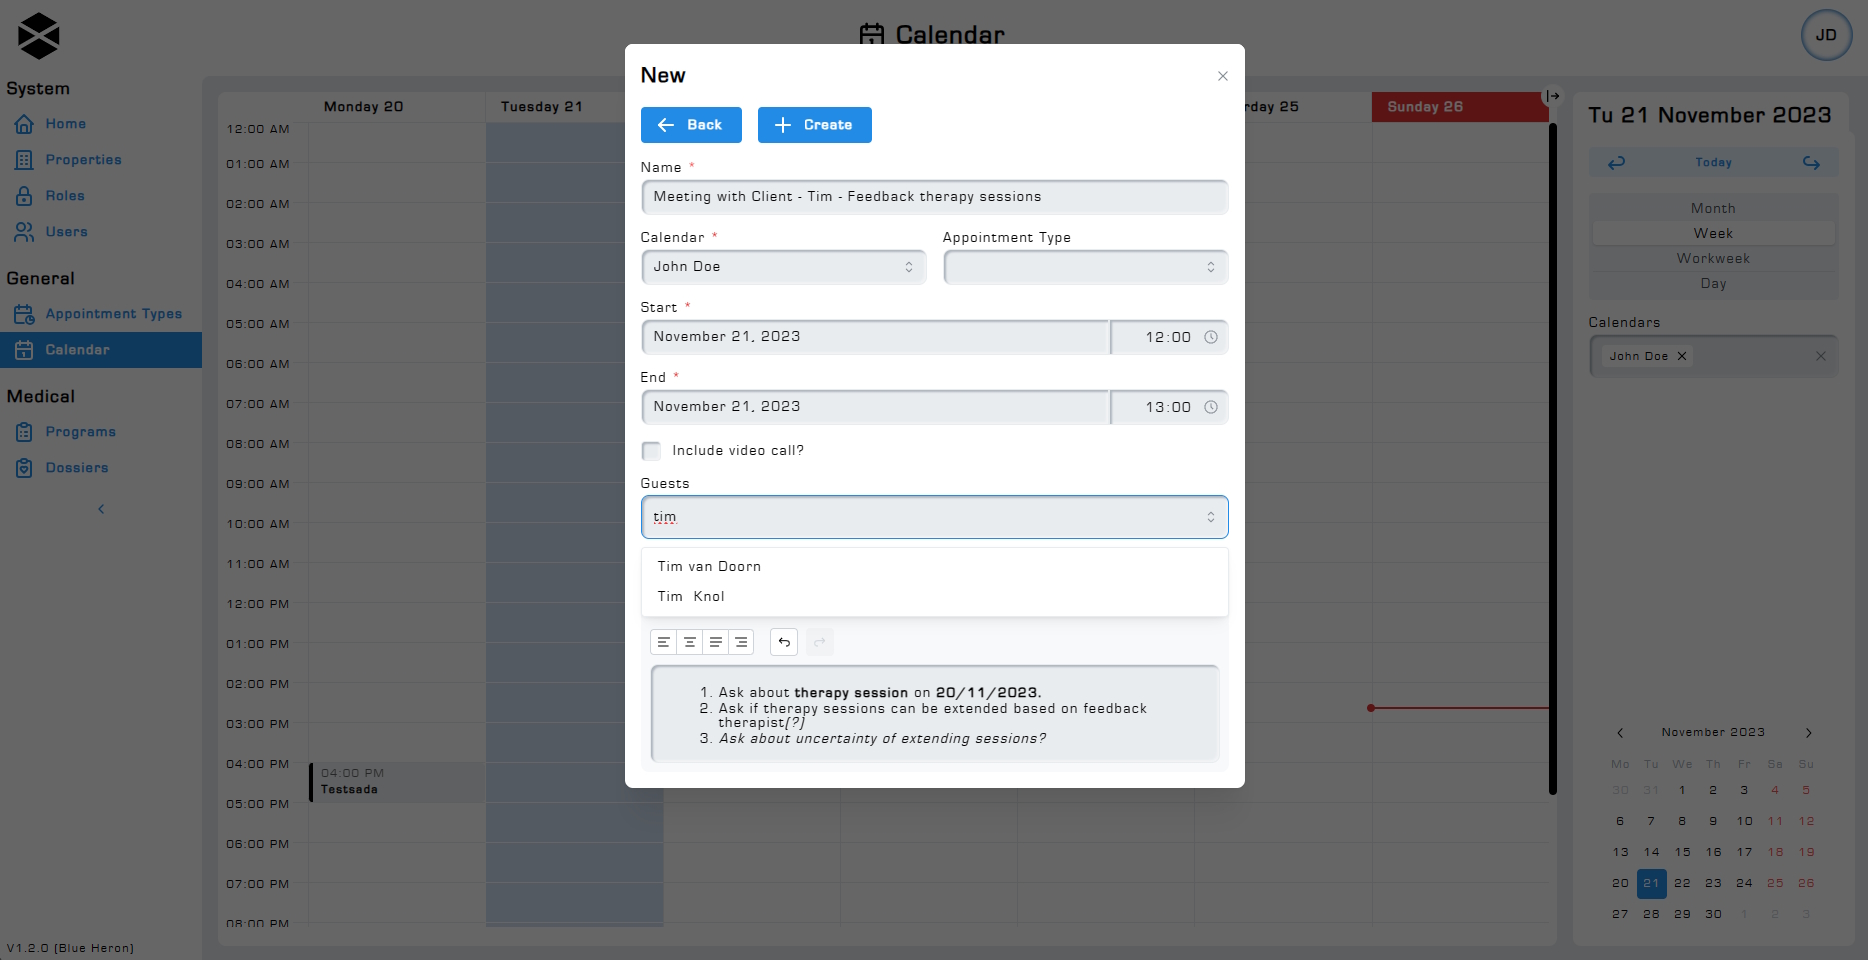
Click on any square in the calendar overview screen to open the appointment creation window, next, fill in event details like the title, description, date, start time, and end time. The date / time you clicked on is used as the initial start and end date / time for the appointment, depending on the current scope.
Add guests using the Guests field. Click on the Guests field to see all available guests. To search for users, simply enter their name or a part of it in the search field. Suggestions will automatically be generated based on what you type out. For example, to find a user named John Doe, simply enter either "John" or "Doe" (without quotation marks) to find all users with either "John" or "Doe" in their names. The field even recognizes part of users' names, for example to find a user named "Matthew", simply enter: "Matt" or "Thew" to find all users with either of those phrases in their name.

You will need to enter the appointment name as well as for what user you're creating the appointment for. Remember, the Guest field is for inviting users to your meeting. The Calendar field is for choosing in which users' calendar the appointment is going to be created. This is especially useful for assistants doing administrative work, as the original organizer of the meeting does not have to be the one who actually creates the meeting.
The roles and permissions needed to create appointments in another users's calendar are defined via the roles & permissions system. Read more about the *roles & permissions system by visiting the following page: Roles Guide.
Adding a description, appointment type, inviting guests and the video-call invite checkbox are all optional.
Save your appointment by clicking on the + create button.
3.1 Appointment types
Appointment types are customizable templates created on the Appointment type page. Read more about appointment types on the Appointment types page.
When creating an appointment you can select an appointment type via the Appointment type field. Appointment types are especially useful for quickly creating repetitive meetings, where most details don't change that often.
The duration of an appointment type automatically sets the meeting to that specific length when selected. The duration of the meeting must be the same as the duration set in the appointment type. This allows you to easily change the time a meeting takes place, while keeping the duration the same.
3.2 Sending emails
Upon creating, editing, or deleting an appointment which contains guests, you will be greeted by a window asking if you would like to send emails out to the appointments participants. An email will also be send out to the owner of the appointment, change the owner of an appointment via the Calendar field.
Click on Don't send to not send out any emails and save your changes.
Click on Send to send out emails to all participants, informing them of the update/cancellation.
Click on Back to editing to make further changes.
3.3 Creating appointments in someone's name
To create appointments on behalf of someone else, begin by selecting that person through the Calendar field's dropdown options. Search for users by first clicking on the Calendar field, then proceed to type in a user's name. Click on the user to add them to your selection. You can only create appointments in another person's calendar if you have the necessary permissions to do so. This is determined by the General > Appointments > Manage all appointments permission. Please refer to the Roles & permissions page for more information about how to create and assign roles and permissions.

Upon saving the appointment it will immediately show up in the selected user's calendar.
4. Editing appointments
Editing existing appointments is straightforward. Select the appointment from the calendar overview, make the necessary changes, and save the appointment via a click of the + Save button.

5. Deleting appointments
To delete an existing appointment, select it from the calendar overview screen. Click on the delete button to permanently delete the appointment.
